Tuesday, November 6, 2012

Back on the horse

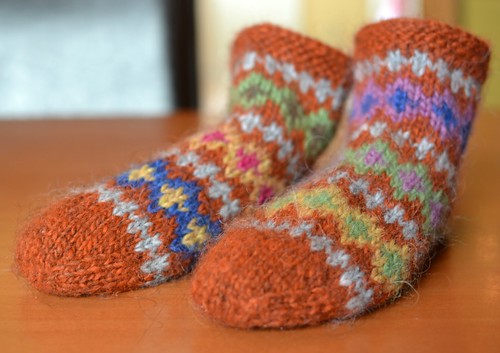
My knitting-I-can-show-off and talking-about-knitting-in-public mojo were missing in action for a couple of months, but I've eased back into the swing of things with some slippers of many colours.

lopi slippers

I used Álafoss lopi with 5mm needles, for a finished fabric that's bulletproof-dense. They're knitted from the toe up, beginning with a figure-8 cast-on, and have plain old short-row heels. The cuffs are finished with a few rounds of garter stitch and a moderately stretchy crocheted bind-off. I was racked by colour indecision when I was planning them, so picked orange for the background and used all the rest of the colours I had available in the foreground.

These were a practice run at stranded colourwork patterns for a sweater I'd like to knit. There was a while where I wanted to make a lopapeysa for myself each year so I'd have a little archive of colours I liked or small repeating patterns that had been on my mind in years past in my closet. I got distracted from that ambition by about three dozen pairs of socks and discovering Herbert Niebling and cones of 2/28 silk thread, but now it seems to be back?

The sweater will include many or most of these colours, but toned down by having the grey in the background instead of, uh, screaming orange. I'm knitting it concurrently with some smaller-gauge projects as a break for my head and heart and hands and wrists; maybe by the weekend I'll have a pair of sleeves to show for it!

Thursday, August 2, 2012

Bookworm

I am pleased to report that Fresh Designs: Shawls is now available from Cooperative Press!

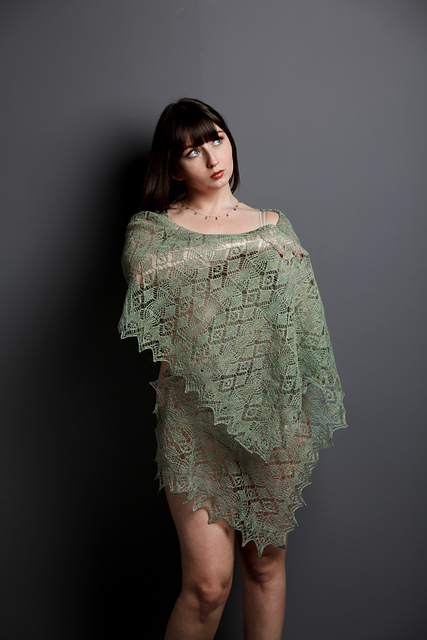
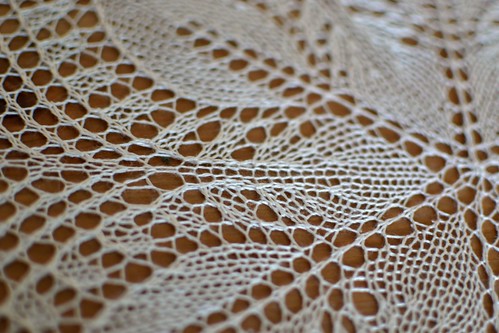
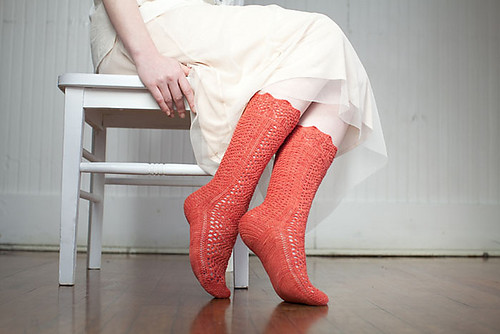
The source of my pleasedness is that a shawl design of mine is in there. I named it Iris because of the somewhat eerie resemblance its central motifs bear to eyes with long fringed lashes, some open and some closed.

(Photo by Robert Gladys, courtesy Cooperative Press)

The book is available digitally or in print or both from the publisher. You can also buy the digital edition from its source page on Ravelry, where it will be conveniently added to your library.

You all know that Shannon and Elizabeth from Cooperative Press are awesome, right? With our powers combined we'll be running an Iris shawl knitalong starting up in the next few weeks, hosted in the Cooperative Press group on Ravelry. I know that lace knitted without resting rows can be complicated to follow and technically challenging to knit—but we'll go at a relaxed pace, I'll share as many tricks as I know and solicit yours, there'll be an amazing prize, and it'll be a fun project to usher us into fall.

If you want a free copy of this book among others and are a Facebook user, here's a handy contest link to click on during the month of August! One lucky dog will win all four of the newly-released Fresh Designs books, plus Audrey Knight's fascinating Reversible Scarves.

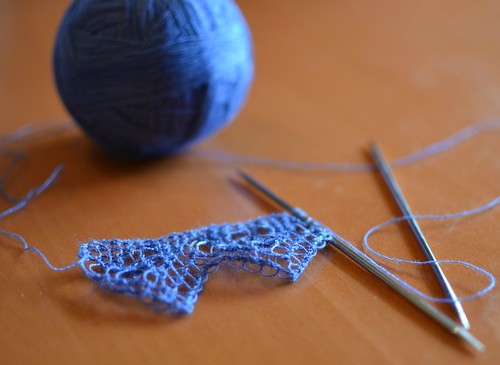
I haven't made up my mind about what yarn I will use—stay tuned for a post about factors to consider when choosing yarn for cobwebby garter stitch lace stuff!—but the strongest contender at the moment is Love Potion #3 from The Gossamer Web, which is a 36/2 cashmere/silk/merino yarn. Susan dyes beautiful vivid colours and has her bases custom-spun for her with an eye toward wedding ring shawls, and the yarns are very rewarding to knit with: they're soft but don't sag, crisp enough to hold a firm blocking and to block out huge, and variegated with discerning subtlety. This ball contains 1250m of yarn and has been patiently waiting to learn its fate for about two years; maybe its time has come! Only swatching will tell.

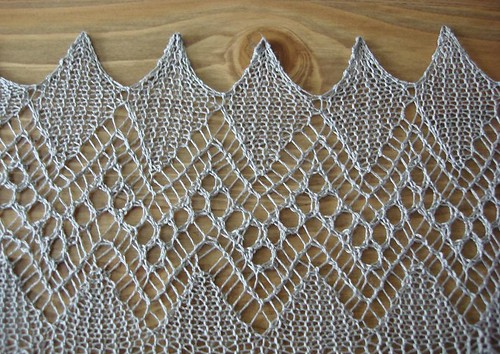
An edging swatch

P.S. Another awesome thing about Shannon and her publishing company is her new magazine, Knit Edge. It's going to be a combination of interesting, challenging knitting and crochet patterns and detailed articles like you might have found in the late lamented FiberArts. To celebrate the book release, she's given me a coupon code to share—use freshdesigns when you buy a one-year subscription to Knit Edge from this page for a dollar off, and one randomly-selected subscriber will have their entire subscription cost refunded sometime this month. Hooray for free things!

Wednesday, July 18, 2012

Digressions

Today was windy, overcast, and intermittently drizzly, so we went to Port-la-Joye/Fort Amherst to admire the hawthorns and the earthwork ruins.

Fort Amherst - 5

The remains of the fort strongly resemble golf course obstacles, especially since Parks Canada keeps them mowed.

Fort Amherst - 3

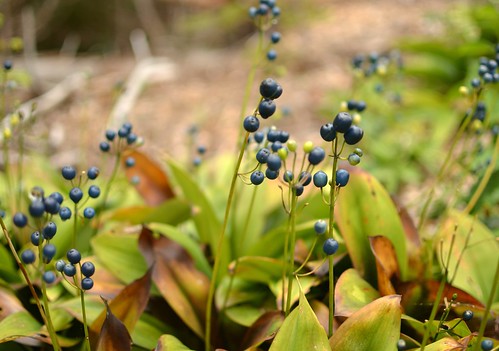
There were also pretty woodland and meadow plants in abundance to complement the hawthorn spikiness, and I am completely satisfied with the trip. These berries are the fruits of lilies, and are a startling dark greyblue!

Fort Amherst - 7

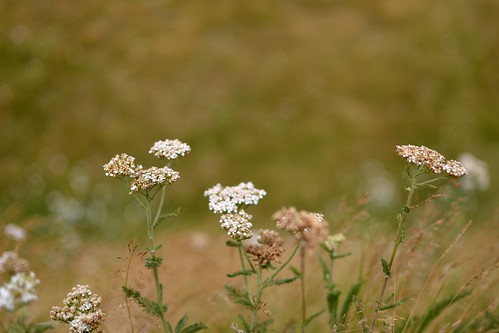
And the remnants of this year's Queen Anne's Lace yarrow are everywhere.

Fort Amherst - 4

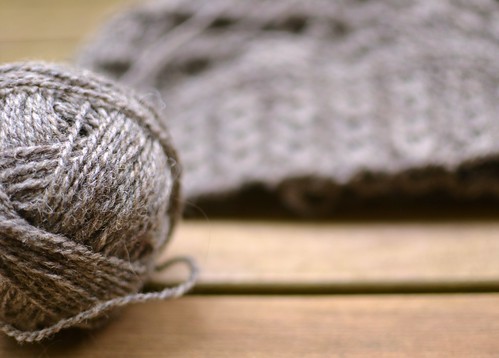
It is a perfect cool afternoon for settling in outside with warm woollen knitting, so I am planning some quality time with Macausland 2-ply Medium project #2. I'm not ready to show it off to anyone yet, but look at the colour—it's a warm grey-brown that changes with the light. The woollen-spun yarn is reasonably smooth in the hank, but it bursts into bloom with blocking and creates fabric that's thick and supple and light and warm. Perfect.

Greybrown Macausland

Monday, July 16, 2012

Detour + Mittens

My partner and I had an eventful road trip from Toronto to Prince Edward Island—car trouble in the middle of a long weekend left us stranded in a sleepy town in southeastern Ontario for a few days. This was the beautiful scene where the alternator died (that's the St. Lawrence River, with New York across the water).

Prescott pier

There are definitely worse places to be stranded than Morrisburg, which is scenic and quiet and a good place to have a spontaneous vacation for introverts. We rescued some books from the car and read for three days, broken up by walks along the seaway to hassle some dignified geese.

Geese feign disinterest

Once we got the car back the rest of the trip was uneventful, and since we arrived I have been sprawled languorously in a comfortable chair on a deck in the shade, knitting with my favourite PEI yarn, Macausland's 2-ply Medium. The spongy Merino DK from Belfast Mini-Mills and the luxury yarn from Fibre-Isle are close runners-up, but my heart belongs to crisp sturdy wool I can knit into fabric that will outlive me.

Detour Mittens

These mittens fell off my needles in an afternoon and evening, so I want to share them with you. They have ribbed cuffs (practical!) whose knit columns meander around one another over the backs of the hands (dense and warm!), eventually narrowing to a pointed tip (whimsy! ... I really can't get enough of mittens with pointed tips, and you could round these ones off if you'd like, by omitting the rounds without decreases toward the end of the tip shaping). If you can't get your hands on Macausland yarn you have my sympathy, and I suggest another woollen-spun heavy worsted like Briggs and Little Heritage.

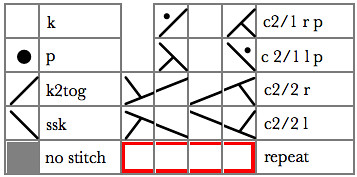
Abbreviations

  • c2/1 r p – two-over-one right purl cross: slip next stitch to a cable needle and hold to the back of the work; knit 2; purl the stitch from the cable needle
  • c2/1 l p – two-over-one left purl cross: slip next 2 stitches to a cable needle and hold to the front of the work; purl 1; knit the 2 stitches from the cable needle
  • c2/2 r – two-over-two right cross: slip next 2 stitches to a cable needle and hold to the back of the work; knit 2; knit the 2 stitches from the cable needle
  • c2/2 l – two-over-two left cross: slip next 2 stitches to a cable needle and hold to the front of the work; knit 2; knit the 2 stitches from the cable needle
  • est – established
  • foll – follows
  • k – knit
  • k2tog – knit 2 together (one stitch decreased)
  • M1L – make one leaning left: with the left needle and working from front to back, scoop up the strand between the most recently worked stitch and the next one; knit into the back of the picked-up strand, twisting it closed (one stitch increased)
  • M1R – make one leaning right: with the left needle and working from back to front, scoop up the strand between the most recently worked stitch and the next one; knit into the front of the picked-up strand, twisting it closed (one stitch increased)
  • no stitch – ignore this; it's a placeholder in the chart
  • p – purl
  • patt – pattern
  • pm – place marker
  • rem – remaining
  • repeat – repeat the outlined stitches and rows as directed
  • rnd – round
  • sl – slip
  • ssk – slip two stitches separately and knitwise, insert the left needle into both of them, and knit them together (one stitch decreased)
  • st – stitch

Materials

  • 1 skein Macausland's Woollen Mills 2-ply Medium (100% wool; 200 yards/183m per 126g skein): 1 skein in Navy
  • 1 set of 5 US #6/4mm double-pointed needles, OR 32" circular needle for Magic Loop. Adjust needle size if necessary to obtain gauge.
  • Stitch markers
  • Tapestry needle
  • Scrap yarn

Finished Size
7.5"/19 cm hand circumference, measured above the thumb. Hand length is adjustable.

Gauge
18 sts and 32 rnds = 4"/10 cm in stockinette stitch (knit every round), after blocking.
24-st-wide cabled panel should measure 3"/7.6 cm wide after blocking.

Charts

Legend
Detour Mittens - Legend

Right Hand

Detour Mittens - Right Hand

Right Tip

Detour Mittens - Right Tip

Left Hand

Detour Mittens - Left Hand

Left Tip

Detour Mittens - Left Tip

Right mitten

CO 44 sts. Join into the rnd, taking care not to twist, and pm.
Next 20 rnds: (P1, k2, p1) around.
Next rnd: Work rnd 1 of Right Hand chart across first 24 sts, pm, k to end of rnd.
Next 2 rnds: Work next rnd of Right Hand chart to marker, k to end of rnd.
Next rnd (inc rnd): Work in est patt to marker, M1R, k1, M1L, pm, k to end of rnd.
Rnds 1–2: Work in est patt to first marker, k to end of rnd.
Rnd 3: Work in est patt to first marker, sl marker, M1L, k to next marker, M1R, sl marker, k to end of rnd.
Repeat last 3 rnds until there are 13 sts between markers.
Next rnd: Work in est patt to first marker, sl marker, sl next 13 sts to scrap yarn, remove next marker, CO 1 st using the backwards loop method, k to end of rnd.
Next rnd: Work in est patt to first marker, k to end of rnd.
Cont as est until mitten measures 3"/7.6 cm above the thumbhole, or just covers the tip of the little finger when tried on, ending on rnd 10 of patt. At end of last rnd, remove marker after Right Hand patt and shift end-of-rnd marker 1 st to the left as foll: remove marker, k1, replace marker.
Setup rnd: Work rnd 1 of Right Tip chart across first 22 sts in rnd, pm, ssk, k to last 2 sts, k2tog. 4 sts decreased.
Rnd 1: Work next rnd of Right Tip chart to next marker, k to end of rnd.
Rnd 2: Work next rnd of Right Tip chart to next marker, ssk, k to last 2 sts, k2tog. 4 sts decreased.
Repeat rnds 1–2 until all charted rnds have been completed and 4 sts remain. Break yarn, thread it through rem sts, and fasten off.
Transfer 13 held thumb sts to needles. Join yarn at CO edge above thumbhole. Pick up and k 3 sts from CO edge, k13, pm. 16 sts.
K every rnd until thumb measures 2"/5 cm, or about 0.25"/0.5 cm shorter than desired finished length.
Next rnd: (K2, k2tog) around.
Next rnd: (K1, k2tog) around.
Next rnd: K2tog around.
Break yarn, thread it through rem sts, and fasten off.

Left mitten

CO 44 sts. Join into the rnd, taking care not to twist, and pm.
Next 20 rnds: (P1, k2, p1) around.
Next rnd: Work rnd 1 of Left Hand chart across first 24 sts, pm, k to end of rnd.
Next 2 rnds: Work next rnd of Left Hand chart to marker, k to end of rnd.
Next rnd (inc rnd): Work in est patt to marker, k to last st, pm, M1L, k1, M1R.
Rnds 1–2: Work in est patt to first marker, k to end of rnd.
Rnd 3: Work in est patt to last marker before end of rnd, sl marker, M1L, k to next marker, M1R.
Repeat last 3 rnds until there are 13 sts between markers.
Next rnd: Work in est patt to last marker in rnd, remove marker, sl next 13 sts to scrap yarn, CO 1 st using the backwards loop method.
Next rnd: Work in est patt to first marker, k to end of rnd.
Cont as est until mitten measures 3"/7.6 cm above the thumbhole, or just covers the tip of the little finger when tried on, ending on rnd 10 of patt. At end of last rnd, remove marker after Left Hand patt and shift end-of-rnd marker 1 st to the left as foll: remove marker, k1, replace marker.
Setup rnd: Work rnd 1 of Left Tip chart across first 22 sts in rnd, pm, ssk, k to last 2 sts, k2tog. 4 sts decreased.
Rnd 1: Work next rnd of Left Tip chart to next marker, k to end of rnd.
Rnd 2: Work next rnd of Left Tip chart to next marker, ssk, k to last 2 sts, k2tog. 4 sts decreased.
Repeat rnds 1–2 until all charted rnds have been completed and 4 sts remain. Break yarn, thread it through rem sts, and fasten off.
Transfer 13 held thumb sts to needles. Join yarn at CO edge above thumbhole. Pick up and k 3 sts from CO edge, k13, pm. 16 sts.
K every rnd until thumb measures 2"/5 cm, or about 0.25"/0.5 cm shorter than desired finished length.
Next rnd: (K2, k2tog) around.
Next rnd: (K1, k2tog) around.
Next rnd: K2tog around.
Break yarn, thread it through rem sts, and fasten off.

Finishing

Weave in all ends, but don't cut them off yet. Use the end at the base of each thumb to mend any holes in the area if necessary. Block mittens by soaking in lukewarm water, squeezing out excess water in a towel, and laying flat to dry. Pat the cuff ribbing into shape without stretching. When mittens are completely dry, cut off the woven-in ends and wear with glee.
Friday, June 29, 2012

Race against time

Race against time II

The knitting on my hopefully-I-can-wear-this-on-Saturday cardigan is finished; it didn't dry overnight on my living room floor (and who could blame it in this weather), so this morning I hung it out on the fire escape while I slung garbage bags and boxes around. Dry in twenty minutes! With twenty-six hours to spare!

More anon when I am less crunched for time. In the meantime, the yarn is a 2/15NM cashmere/merino from Colourmart; the pattern is a plain old top-down raglan with lace bits all over it and many short rows starting at the bust point to add length to the fronts. I have a feeling I will want more cardigans much like it.
Friday, June 22, 2012

A descent into chaos

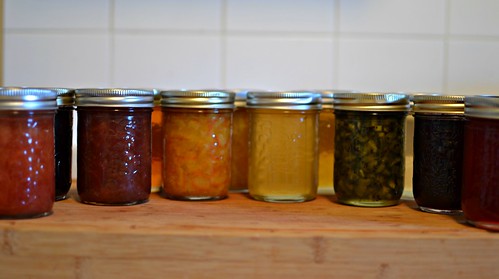
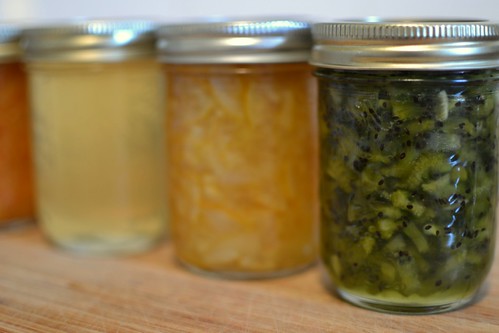
I am provisionally declaring my jam spectrum project finished.

Jam spectrum

There are twelve jams, jellies, and marmalades all told. Left to right: red plum and white pepper jam; cranberry, hibiscus, and ginger jam; rhubarb and lemon marmalade; apple and jasmine jelly; tangerine and rosewater marmalade; Meyer lemon and vanilla marmalade; rosemary and lemon jelly; lemon and camomile jelly; kiwi and jasmine jam; dill jelly; blueberry, lemon, and vanilla jam; black plum, blackberry, and cardamom jelly. Whew. There are more oranges and yellows than anything else and the blueberry one is not especially blue, but it looks indigo next to the black plum and blackberry jelly, which is quite purple. If I discover borage in bloom that someone will give me before next Saturday, though, I will make jelly out of that and switch it out for one of the yellow things in the middle.

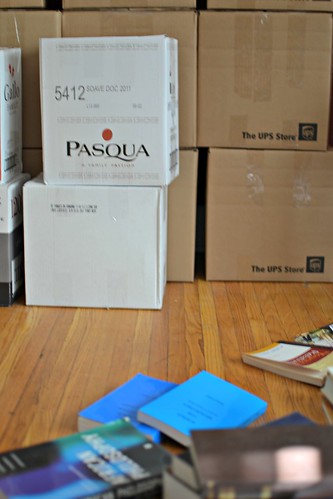
Meanwhile the rest of my life looks basically like this.

Boxing

We have not too many hundreds of books, but taking an inventory of all of them and dividing them into piles for shipping to various places (dissertation pile! postdoc-maybe pile! someday-book-project pile! wait-I-meant-to-read-that pile! why-did-we-buy-this pile!) is time-consuming and tiring and hot work in the heat wave that has settled over my city.

Race against time

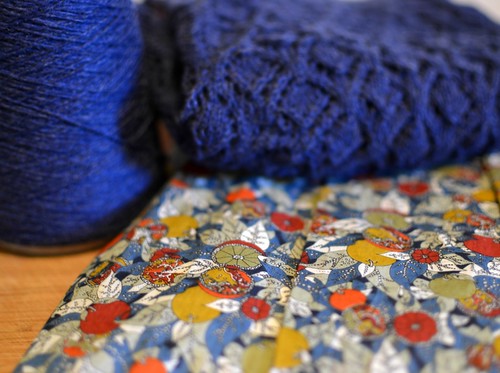
Now that the jam project is polished off and I need breaks from and rewards for packing, I have turned my attention to a cardigan project from a few months ago, and have added a deadline to it. I have an amazing Liberty dress with oranges! on it, with which the cardigan will coordinate handsomely. It's a top-down raglan one and I intend for it to have elbow-length sleeves; right now there's about an inch of body left to knit, with sleeves, front bands, and neckband remaining. If I can also finish this before next Saturday, I will be extra-adorable at the wedding of the friends for whom the jams are intended. WE WILL SEE.

Sunday, June 10, 2012

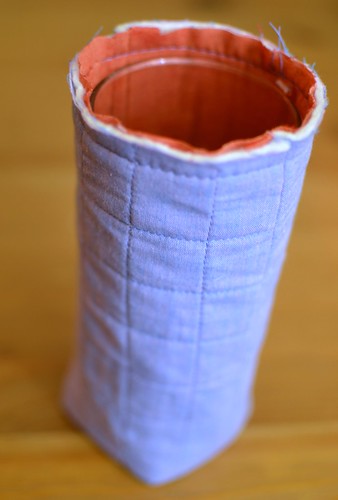
A padded drawstring bag for lenses or other precious bits

This afternoon I spent some quality time with the sewing machine, making a little bag for a lens that didn't have one. It was a pretty good time—with some fun hand-finishing details for extra cushioning and sharpness of appearance—so I'll share! Also illustrated: the drama of the shift from late-afternoon to early-evening light through my apartment's west-facing window.

You'll need:

  • an item that needs a cushiony bag to keep it safe
  • a measuring tape or ruler
  • fabric for the shell, lining, and drawstring casing: I used shot cotton scraps
  • batting
  • a marking tool for drawing quilting lines
  • something to use as a drawstring—a length of cord, a ribbon, hot pink seam binding ribbon?
  • matching threads
  • pins
  • a hand sewing needle
  • sewing machine

Measure the diameter and length of your object. Add 3" to the length measurement for seam allowances and space for gathers. Divide the diameter measurement in half, and add 1" for seam allowances and at least 1/2" for ease (add more for a looser bag). Make a note of the resulting numbers—mine were 8" length and 6" width. Cut two pieces each of shell fabric and lining to these dimensions. Cut two pieces of batting slightly larger.

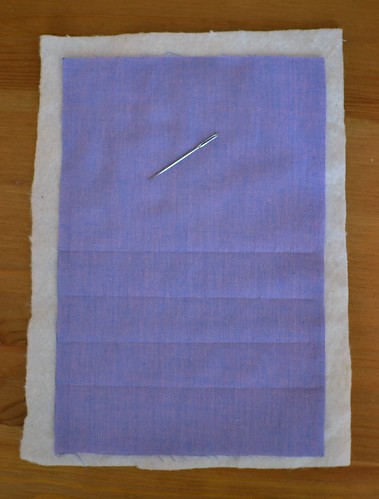
Set aside the lining pieces for now. Smooth each shell rectangle against a batting rectangle. Mark quilting lines on it with a hera marker or fabric marker (if you have neither, use the needle you use for weaving in ends from knitting projects to draw creases).

padded bag - marking lines

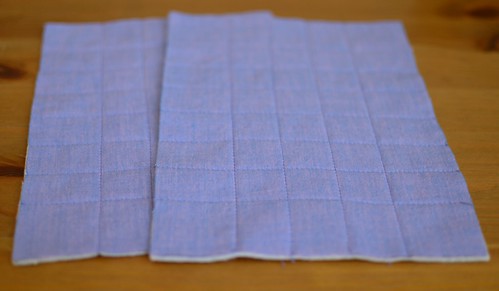
I quilted a 1" grid, leaving an extra 1/2" all around for seam allowances.

padded bag - quilted shell

Cut off the excess batting around the edges of the shell fabric rectangles. Put them right sides together and sew up the bottom and sides at 1/2".

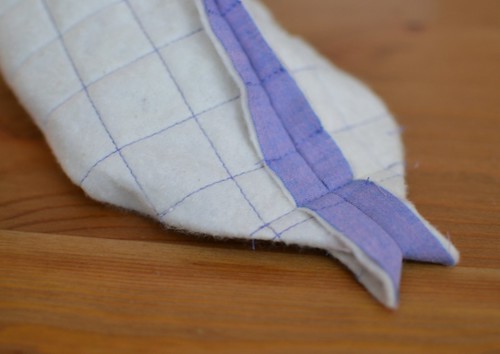
To form the bottom of the bag, fold it so that one side seam is aligned with the bottom seam. Measure 1-1/4" from the point and sew a straight line across. Trim off the point 1/4" from the new seam. Repeat for the other side. (The depth of the bag will depend on how far these seams are from the corner—estimate where you'll want to sew, pin it, and check that you're satisfied with the shape of the bottom before sewing these seams.)

padded bag - forming the bottom

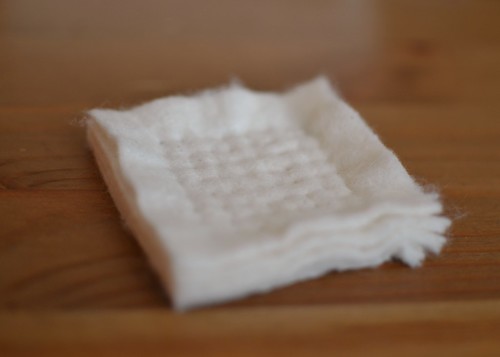
To make the padding for the bottom of the bag, measure the bag bottom and cut 4–6 squares of batting slightly larger than it. Arrange them in a stack and sew them together with a fairly closely-spaced grid of prick stitches. The goal is to make the batting stack into a firm square of padding about 1/2" thick; the neatness of your prick stitching is immaterial as it'll be completely hidden in the finished bag.

padded bag - prickstitched

Once the padded square is finished, tack it to the inside bottom of the shell, and turn it right side out.

To make the lining, place the lining rectangles right sides together and sew around the sides and bottom at 1/2". Form the bottom of the lining the same way as for the shell. Slip the lining into the shell and trim the raw edges at the top to match. Baste them together at 3/8", easing the lining to fit, then sew them together at 1/2".

padded bag - basted together

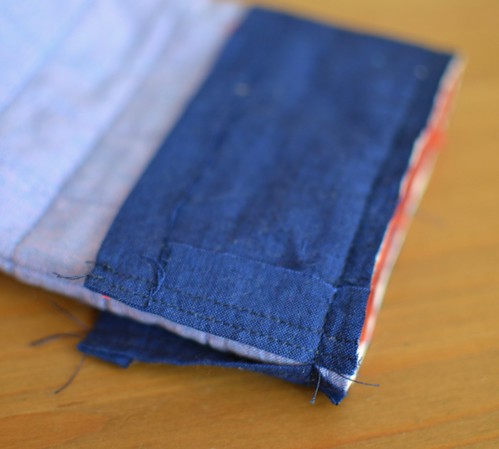
To make the drawstring casing, measure the diameter of the bag and cut a piece of fabric 2" wide x that measurement + 1". Fold the short ends in 1/2" and press; fold one long edge in 1/2" and press again. Edgestitch close to the fold along each short end.

Attach the drawstring casing to the bag by pinning the unfolded edge to the edge of the bag, right sides together. Stitch at 1/2", then trim the seam allowance to 1/4".

padded bag - edgestitched drawstring casing

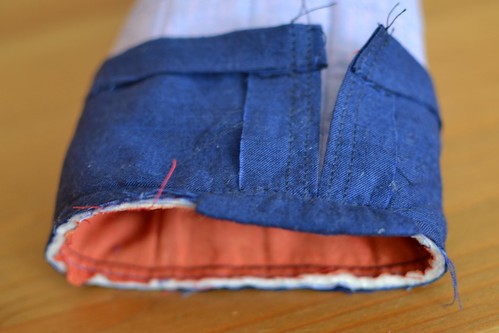
Cover the raw edge of the bag where the drawstring casing will open by cutting a piece of the drawstring casing fabric 1" x 1.5". Fold in half lengthwise and press, unfold and fold the long edges toward the centre and press again, then fold in half again along your original fold line (like making double-fold bias tape, but with fabric cut on the straight of grain.) Pin the folded piece around the raw edge where the casing ends meet and slip stitch in place, first on the outside of the bag and then on the inside.

padded bag - covered seam allowance

Finish the casing by folding it to the inside and slip stitching the folded edge to the lining. Finish the ends of the drawstring as you prefer. Attach a safety pin to one end of the drawstring and thread it through the casing.

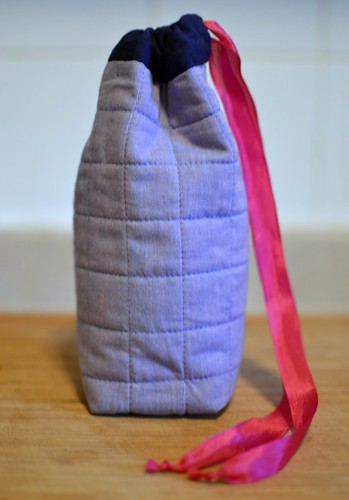
A little bag for lenses

Hooray!

Saturday, June 9, 2012

The simplest apricot jam

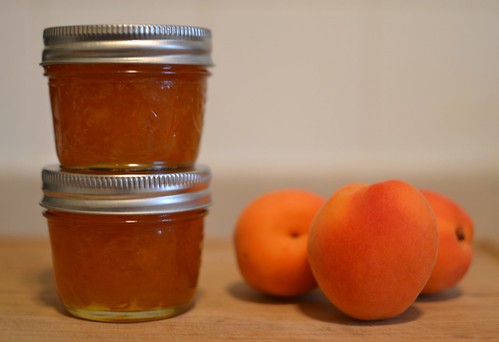
I made this photoset to reassure a friend the other day, but it may as well also be shared with the internet at large! A small batch of the absolute plainest apricot jam is a fun project to break up a weekend—it only takes a little bit of attention each day, and the result is delicious and fresh-tasting and tart and intensely apricot-flavoured. You will need apricots, sugar, and lemons.

1

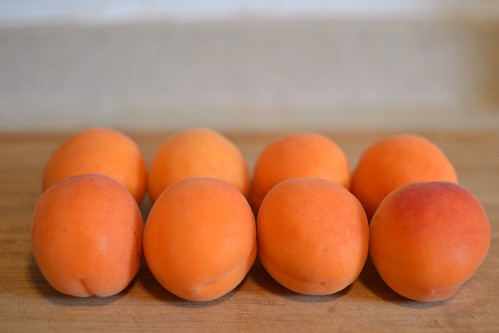
1. First find some apricots! A little underripe is best; ripe is adequate though not ideal; overripe is not worth the trouble.

2

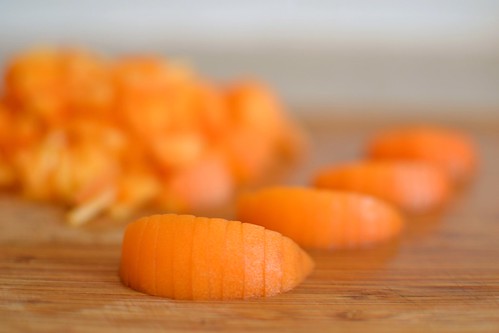
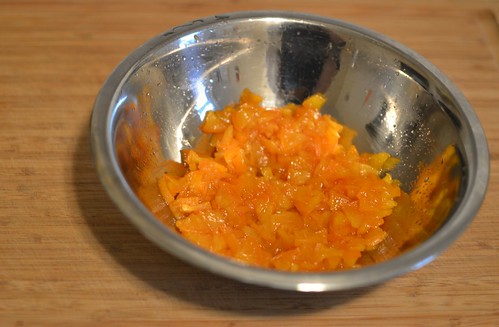
2. Wash them thoroughly and chop them as you desire. I cut mine into lengthwise eighths and then into wedges about 1/8" thick. If you are troubled by apricot skins, you can blanch the fruit and peel it first; I find them soft enough that I don't notice their presence in the finished jam.

3

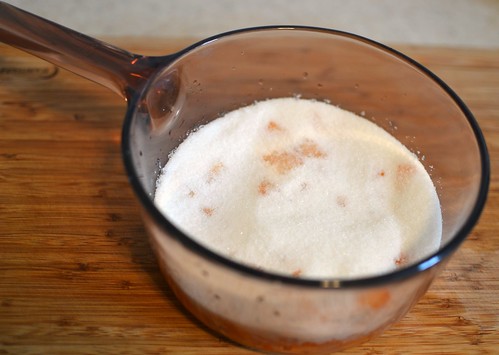
3. Measure the volume of chopped fruit. Add to it the juice (& optionally the zest) of one lemon per cup of fruit, and three-quarters of the fruit's volume in sugar.

4

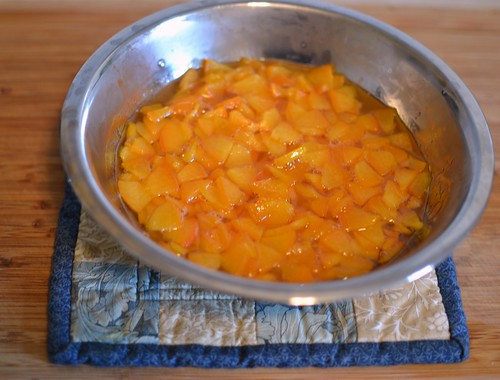
4. Heat the fruit-and-sugar mixture gently until it just barely reaches a boil—the combination of heat and sugar will draw out a lot of liquid. Remove it from the heat, cover, and let it rest in the fridge for at least six hours and up to 48.

5

5. After its rest in the fridge, strain the chunks of fruit out of the thick golden syrup that's developed, and remove them to a bowl. Pour the syrup into a pot and put it back on the heat. Bring to a full boil and keep it there until...

6

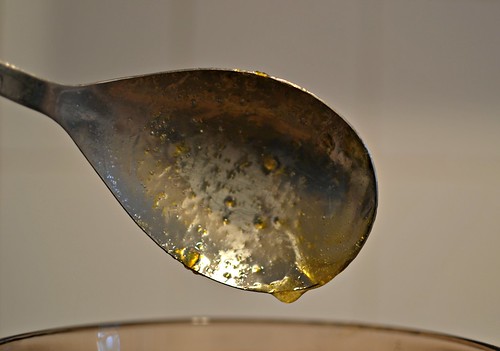
6. ... the syrup has reached its gelling point, 4° C above boiling. Check this without a thermometer by dipping a spoon into it and watching how the syrup drips off. The syrup is done when it sheets off the spoon, pictured above—the drops will be thick and slow-moving, clinging to each other and the spoon. Add the strained fruit back to the syrup, return to a boil, and cook for five more minutes.

7

7. Transfer the jam to sterilized jars and process them in a boiling water bath following these directions. Or just pour it into a clean jar and keep it in the fridge if you plan to eat it in the next few months.

Wednesday, June 6, 2012

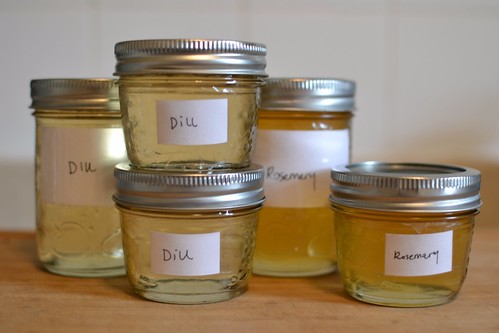
Wordless Wednesday: before and after

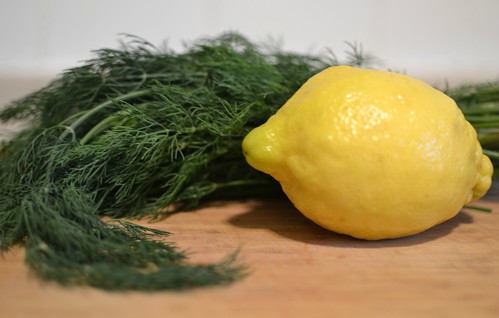
Raw ingredients Jellies

("Dill" stops looking like a word when you write it a bunch of times!)

Sunday, June 3, 2012

Weekend plaid

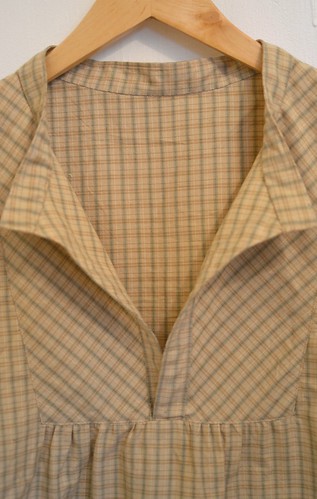
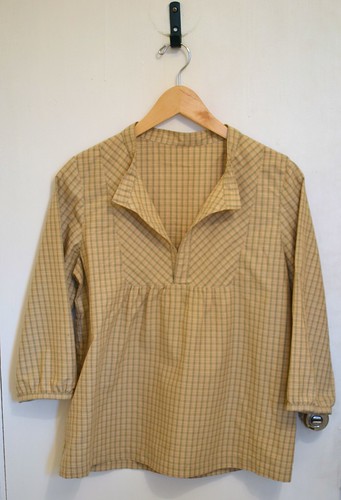
My very stylish friend wears plaid to distinguish weekends from weekdays, and I am envious of his strategy. And I have been admiring Jenny Gordy's Wiksten clothing for a long time, some patterns for which were recently made available in .pdf form. Clearly this project's time had come!

Tova shirt

This is a Tova shirt, and it probably won't be the only one I make (bloggers seem to make them in twos and threes and now I understand why!). It was quick and fun to put together with room for lots of the hand-sewn finishing details that I cherish. The inset (here cut on the bias), collar, placket, and cuffs don't take up much fabric, and I imagine that they would be fun places to put pretty FQs to good use. If I used a fabric with an obvious wrong side I'd underline the inset, though. This mellow straw-coloured shirting was supercheap from fabric.com, and is soft and light without being silky or slippery.

Tova inset

Don't look too close at the placket, which I sewed in upside-down and only noticed quite a bit later (oops). The inside of the collar is folded up and sewn down by hand, which is my favourite treatment for this kind of edge, much preferred over topstitching. My gather distribution below the inset got kind of uneven in the middle there—the machine had a bit of trouble powering through all the layers of the placket and inset—so next time I'll take a bit more care with my basting in that area. Setting the inset into the front was a challenge until I figured out that you can do it in three stages (straight across the bottom from drillhole to drillhole; up one side; up the other).

I made a few very minor alterations, because I am relatively bounteous of bosom and buttock compared to the rest of me. I cut a size L, but added 1/4" to each side at the armhole, tapering to nothing at the waist, for a total of 1" extra room. I also widened the sleeves by 1/2" and shortened the shirt by 3" so it hits just a couple of inches below my hipbone. It's comfortable and easy to wear, and I am satisfied!

Thursday, May 24, 2012

Monogram

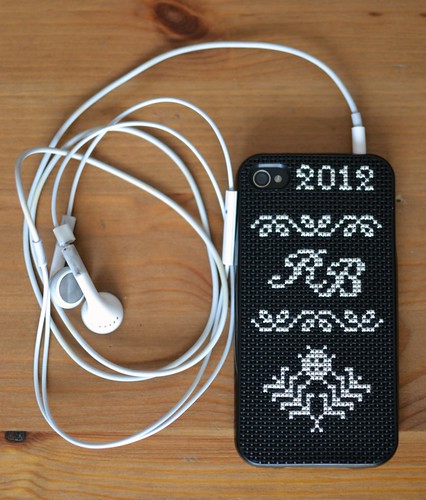
One great thing about those plastic canvas iPhone cases is that whatever you embroider on them will start to look worn out long before the plastic itself does. Maybe this is not so great if you produce only excellent work that satisfies you forever, but for fickle changeable me it's pretty ideal. I had a grouchy curse on my phone for a few months, but last night I removed it and replaced it with something a bit classier.

Some recent sifting through my mountain of pattern samples has left me feeling very grateful for Ravelry, without which I'd never really know when I made something or indeed whether it was me who made it. I don't sign or date my knitting the way I might a big piece of embroidery or patchwork or a garment (on a tag attached to a seam allowance inside). There are some tells that something was mine—obsessively adding yo-k2togs at the beginnings of edging rows; revisiting Mrs Montague's Pattern and its variations over and over; arranging almost everything into grids—but looking at all that work carefully produced but unsigned freaked me out a bit, and it came out in my noodling around on the phone case.

Monogram

There is very little to this design other than that I signed and dated it. The alphabet I drew the letters from is in an old DMC booklet of many alphabets and borders; the letters are slightly too small to have effectively twined together, so I just nestled them close instead, and I think it still counts as a monogram. It looks pretty portable and I want to add it to other things now (towels? handkerchiefs? the insides of things I sew for myself?).

This is ecru DMC floss, and I doubt that it will stay looking pristine for very many weeks, but I also doubt that I won't change my mind and want to re-embroider again in the same timeframe.

Sunday, May 20, 2012

Knitscene Accessories

I had a frustrating RSI week and am trying to limit typing and knitting (note: finding activities to do that don't exacerbate existing RSI pain and overdoing them until everything hurts is not a great coping strategy!). But! I have some things to show off that I am pretty excited about and maybe you will like them too. These were my happy-funtimes projects in December, and I loved having them to work on intermittently while I was also tackling my challenge socks.

Thing 1 is quick-to-knit ruched socks with a springy DK-weight superwash merino! Knitscene named them Clandestine Socks, I hope because of the tiny lace at the cuff edge which is totally hidden if you're wearing pants.

clandestine socks

(Photo courtesy Knitscene)

Thing 2 is Wellington Mitts, small fingerless gloves that just reach the wrist. The stranded colourwork pattern zigzags differently on each hand; I hope they'll appeal to people like me, who tend to like knitting things that come in pairs but hate knitting the same thing twice. Harrisville New England Shetland is, as always, fabulous yarn for colourwork.

wellington mitts

(Photo courtesy Knitscene)

These guys are on the cover, and I am delighted because I thought they were very cute and they were a lot of fun to knit. The magazine was just made available for digital download and preorder; it'll be on newsstands at the beginning of June.

Tuesday, May 15, 2012

Tacit Tuesday

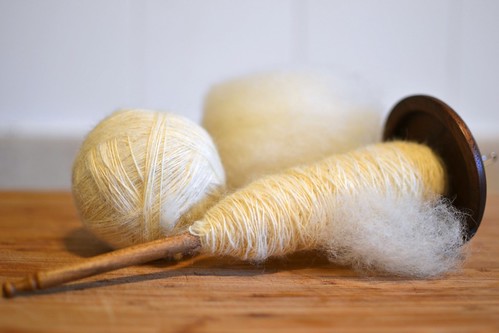
Llama and wool

I put this spindle and a bag of fibre in a corner of the kitchen last week, to fiddle with while waiting for oil to heat or water to boil. It seems to be coming along!

(The fibre is llama/wool roving, which I am spinning with a long draw to turn into a rather puffy and hairy 2-ply for Jane, who likes sheepy yarns with character.)

Monday, May 14, 2012

Continuing apace

I am still slowly working away on the jam spectrum project. Here's yellow and green:

Jam spectrum: yellows and green

Left to right: a sliver of tangerine & rose marmalade; lemon & camomile jelly; Meyer lemon & vanilla marmalade; kiwi & jasmine jam. (Not lime after all, because I screwed that up by getting distracted by something while it was simmering—when I looked back a couple of minutes later it was a simmering pot of lime caramel. Oops.)

Saturday, May 12, 2012

Palate cleanser

I finished the doily I was knitting the other day, and I think I might love it.

Dahlia doily

It's #36, Jurginas/Dahlia, from Staltiesėlės by A. Pelakauskienė, which is very difficult to find in print but easy to find scanned on the internet. I blocked my doily a bit more ferociously than the book's sample-knitter blocked hers, so that it's actually hexagonal. After blocking it measures 16" across.

Dahlia doily, detail

The way the petals begin and curve apart from each other is the most clever thing in the world.

The whole book is great; none of the knitting is very strenuous once you get past the initial rounds of very few stitches, and each doily is interesting, even the ones that are variations on other doilies in the book. Most of them are round-ish but there are a few small square pieces, too. None of them is enormous; they're nice little break projects if you want a change of knitting scenery without a whole lot of commitment. Maybe I will knit more!

…but not yet, since I seem to need my doilies-with-20/2-silk-thread needles for another purpose.

Gold sock

I talked my partner into 20 hours' worth of movie theatre opera dates over a week and a half, and since I can't seem to sit still for hours at a stretch without something fiddly to do, I started some new socks in a pattern that's easy to do by feel. It's travelling broken 2x2 rib that will spiral in opposite directions on opposite feet, and I think the heel flaps will involve zigzags (for knitting during intermissions) and the toes will involve spiralling decreases (for finishing off post-opera). #2 is tomorrow morning; I have my textbuch mit den hauptsächlichsten leitmotiven and my knitting and am ready to rock.

Friday, May 11, 2012

Idée fixe

I have loved the edging from the Madder and Ivory Wedding Veil (1891), charted by Sharon Miller in Heirloom Knitting, for about as long as I've known it existed. I clumsily swatched it over and over, thinking about how to ease it around corners (it's tremendously wide), but never using all of it on any of my own projects.

I used the outer part of it in a shawl project in 2008 (from the Unst Stole, by Sharon Miller):

unst stole - edging

And I had various ideas and ideas for ideas since then, but no follow-through, just a little pile of swatches in a file folder.

A swatch!

When I got a call for submissions for an Interweave digital product last year, I decided that the edging's and my time had come at last, and that it would turn into knee socks. And so it did.

madder stockings

Yesterday Anne posted the preview gallery for LaceKnits, a new digital product from Interweave, which includes my stockings and lovely patterns from Carol Feller, Laura Nelkin, Heather Zoppetti, and Donna Druchunas. It's for the iPad, and available from the App Store. I see that the stockings are paired up with a historical essay by the incomparable Franklin Habit and an article on grafting in pattern by Joni Coniglio, so I'm feeling in very good company.

Knitting the sample was one of the most challenging projects I've ever undertaken, even though it was totally my own idea and I volunteered to do it. Once the design was commissioned it took me a few days to realize that it actually was possible for me to do. Knitting these patterns back and forth in fine, drapey 2-ply yarn is one thing, but knitting them in dense, springy yarn in the round turned out to be quite another. In my entire knitting life before producing these socks, I had never purled three together so many times as they required (and I still have the callus to show for it, months later). I emerged from the experience a stronger and more confident knitter—which felt like quite a trick, since I knit for dozens of hours a week and have done for years.

Madder stocking in progress

The yarn—A Verb for Keeping Warm's High Twist, in madder-dyed colourway "Transnational Fury"—was absolutely perfect for the project, and I am grateful to Anne for having found it for me. It's a very round and sproingy heavy laceweight yarn that produces a beautiful, dense garter stitch and smooth, squishy stockinette. I can also vouch for its sturdiness in knitting, having frogged and reworked several sections of the sample socks more than once to no ill effect. If you ever want to knit lace socks at 10+ stitches per inch (and maybe I do, now that I've done it once), it's exactly what you need.