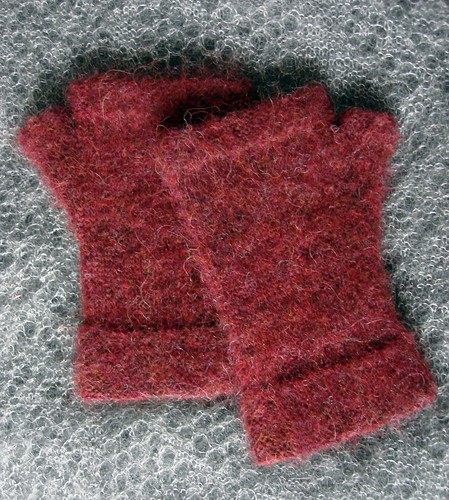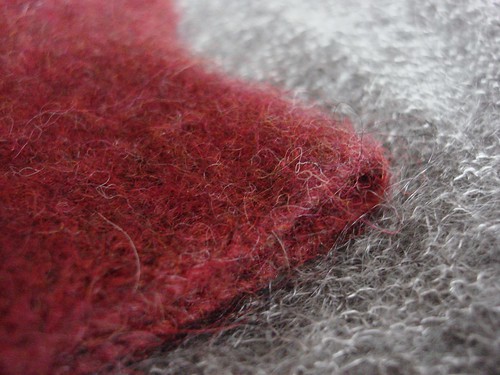
Hey, do you want to make shaggy, woolly fingerless mittens, too? Do you have a cake of plötulopi hanging around, and 2.75mm double-pointed needles (or circulars for magic looping or 2-circ methods), and some sort of scrubbing or brushing implement? I don't recommend substituting a different yarn because the finishing stage of this project sort of relies on the qualities of unspun Icelandic wool—the fabric gets fulled a little bit, then brushed vigorously with a flick carder, wire brush, or plastic scrub brush. Icelandic wool is great for this purpose because the sheep are double-coated: there's a very soft, very fine undercoat (thel), then progressively coarser, longer hairs (tog). They're blended together in this yarn. It's pretty easy to raise the nap; the yarn is so loosely structured that it doesn't offer much resistance.
Mohair or a mohair blend would work, too. Look for long, hair-like fibres in the yarn that want to work loose. Not merino, not superwash.
Bonus: close-fitting fingerless gloves make a great base layer for wearing underneath bulkier mittens, like long underwear for your hands! Double bonus: oh man, do my sore wrists feel better when they're swathed in warm, fuzzy wool.

This barely qualifies as a pattern, it's so simple, but I've named it Poilu.
Materials
Istex plötulopi (100% Icelandic wool; approx. 300m/100g cake); 1 cake (you'll use about a third of it)
set of 5 US #2/2.75mm double-pointed needles, or a long circular needle for magic looping
scrap yarn
tapestry needle
flick carder, wire dog/cat brush, or plastic scrub brush
Gauge
… is actually not that important for this project, since the finished mitts can be fulled down to size and can be tried on during the process. Pre-fulling gauge for the sample pair was 26 sts and 36 rnds = 4" in stockinette.
Finished size
Sample mitts measure 7.5" around. Since there's no pattern to interrupt, these are the easiest thing to resize; cast on more stitches for bigger mitts and fewer for smaller mitts, and work as many thumb gusset increases as you need to fit your hand.
Bear in mind two factors when resizing: fulling will shrink them a bit, and you'll be brushing the insides, too. Too-large mitts are easier to fix at the finishing stage than too-small ones.
Abbreviations
k: knit
p: purl
rnd: round
st: stitch
m1: make one
p3tog: purl 3 together
CO: cast on
BO: bind off
Stitch guide
Garter stitch (worked in the round):
Rnd 1: K.
Rnd 2: P.
Repeat rnds 1-2 for garter stitch.
Mitt (make 2 alike)
Cuff
With a single strand of plötulopi, cast on 52 sts, being careful not to break the yarn (it's fragile!). Divide sts between needles and join for working in the round. Mark or note beginning of rnd.
Work garter stitch for 20 rnds.
K 20 rnds.
Thumb gusset and hand
Next rnd: K25, place marker, m1, k1, m1, place marker, k to end.
K 2 rnds.
Next rnd: K to first marker, slip marker, m1, k to next marker, m1, slip marker, k to end of rnd.
Repeat previous 3 rnds until there are 15 sts between markers. K 2 more rnds.
Next rnd: K to first marker, remove marker, slip next 15 sts to scrap yarn, remove next marker, CO 1 st using the backwards loop method, k to end of rnd.
K 5 rnds.
Work garter stitch for 10 rnds.
BO loosely.
Thumb
Transfer held thumb sts to needles, dividing for working in the round as you go. Join yarn and k across these sts, then pick up and k 3 sts from CO edge of hand.
Next rnd: P to last 3 sts, p3tog.
Work garter stitch for 8 rnds.
BO loosely.
Finishing
Weave in and cut off all ends. Full the gloves by agitating them first in hot water, then in cold water, until the stitches are slightly obscured and the mitts are a little smaller. (Squeeze out excess water and try them on to make sure they’re the right size for you before calling it quits.) Pat mitts into shape, then lay flat to dry. When the mitts are completely dry, brush their surface with a scrub brush or flick carder until a furry, shaggy nap appears. Brush more for a shaggier appearance. When the outside of each glove is sufficiently shaggy, turn them inside-out and brush the wrong sides, too.
If at some point in the future you decide they aren't shaggy enough after all, brush some more!
1 comment:
Found the pattern on Ravelry while searching for a real quick wrist warmer - and had some plötulopi in my stash :-) .
Finished the 1st one (already felted) and I am well into knitting the 2nd.
Thank you for posting the pattern :-) .
Post a Comment